We tried to draw several times before. But until now, we only use linear elements. Now we are going to discuss circles and polygons. I don’t usually write details on how using a specific tool. I usually write concept and ‘how to’ tutorial. But i already wrote this tutorial as a book before (in Indonesian). So I don’t want to mess the original material structure anyway.
Circle and polygon are closed shapes. Closed shapes have some properties that open shapes don’t. Let’s see the tool settings for circle.
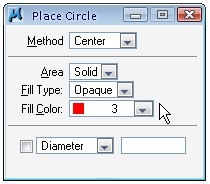
You will see area, fill type, and fill color. You can change the fill type to opaque or outlined. Opaque will place the circle and fill the object with fill color you choose. Outlined will also place the circle with fill color, but still preserve the outline color.
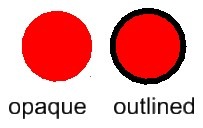
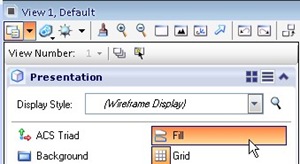
Tips: If you don’t see the fill color, click view attributes on your view toolbar. Select fill. It’s the first icon on your view toolbar.
Circles
Placing a circle
You can place circles using these method:
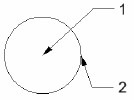
Center: You define two points: the center point and a point on the edge
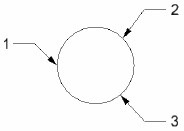
Edge: You define 3 points on the circle edge

Diameter: You define two points on the edge as the circle diameter.
We will do a little exercise at the end of this tutorial, but now:
Placing an Arc
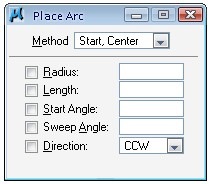
Placing arc is pretty much the same with placing circle. There are some methods and options, but I think they are self explained. You need to try them to understand the options better.
You can define the direction by rotating your pointer to other direction around the center of arc. And of course, you can manually override the direction parameter to CW or CCW.
Placing Polygons
Placing Blocks
Block is a rectangle. MicroStation call it block, but you know it as rectangle in AutoCAD. Block in AutoCAD is cell in MicroStation. Confusing? Sorry, I can’t help it :) But don’t worry about that. Let’s continue…
You can place a block by using two methods: orthogonal or rotated.
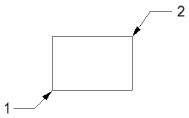
Orthogonal requires you to define two points at the block corners.
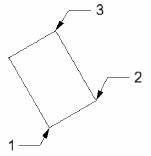
Rotated requires you to define three points: start point, rotation angle, and the block corner.
Placing Shapes and Orthogonal Shapes
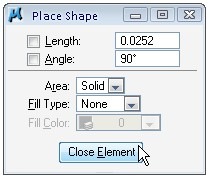
Placing shape is very similar with placing SmartLine. But you have to define the last data point at your first data point, so the shape will close. You can also find one button that you don’t see in other tool settings: close element. Clicking the button will automatically close your shape.
Orthogonal shape is similar to shape. The only difference is the edges is perpendicular to each other.
Regular Polygon
You can create a regular polygon with number of edges from 3 to 4999.
You can use these following method to place a regular polygon. Below are the illustration of the methods. The circle is only for illustration. You will not see it in your drawing.
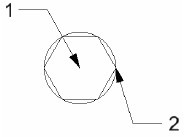
Inscribed: First data point will be the center, and the second is the polygon corner.
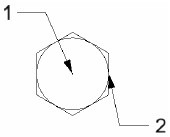
Circumscribed: First point is the polygon center, and the second point is the distance from center to polygon edge.
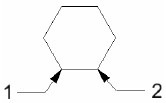
Edge: You define two points on the polygon edge.
A Challenge: Create this drawing using regular polygon, circle, and arc
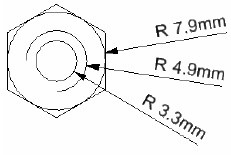
If you have problem, you can download the animation here.



As an autocad user all the time. I’ve got a new job lined up but using microstation. On what I have read so far this site seems to give a good guide on how to use it.