In this Article...
In the last tutorial, we learned how to place commands to ribbon. But we know that ribbon is not everyone’s favorite. What if you want to add the commands to toolbar? What if you want to add commands to menu? Let’s see how we can do it here.
Working with toolbar
Working with toolbar should be easier. It has fewer properties than ribbon.
First, let’s open our CUI dialog box. Remember to activate customization file to yours (mine is cad-notes, yours might be different).
Creating new toolbar
Now we work on our own customization file. Try to click the + sign on the left of toolbars category. You should see there is no item below it yet. Our customization file is empty, remember?
Right click above toolbar, and choose new toolbar from contextual menu.
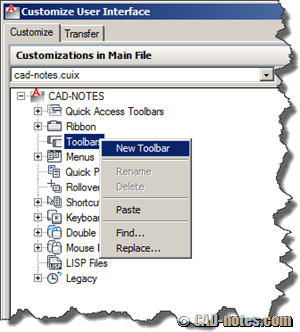
Give your toolbar name. I named mine ‘my viewport tools’. Not very catchy name, but at least I know what tools are in it.
Placing commands to a toolbar
To place commands is easy. Switch to ‘all customization files’ and expand ‘partial customization file’. Expand your cui and expand toolbar.
Drag your commands to your custom toolbar. Very similar with ribbon, right?
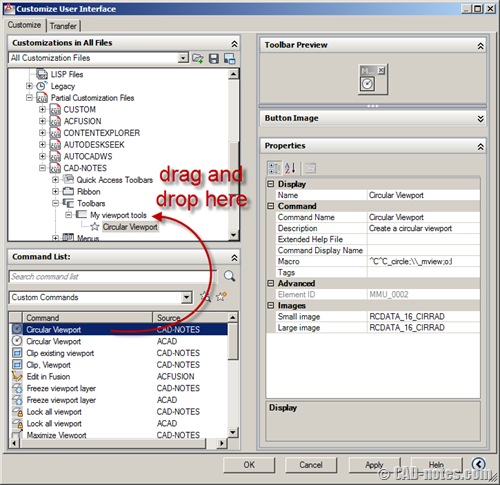
After you finish placing commands, just click OK. You don’t have to add toolbar to workspace, even if you were working in ribbon interface. You should immediately see the toolbar.
Loading toolbar
Just in case you don’t see the toolbar, you can load it manually.
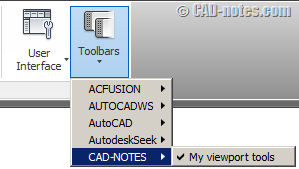
If you use ribbon interface, go to view tab, windows panel, toolbars> YOUR CUI> YOUR TOOLBAR.
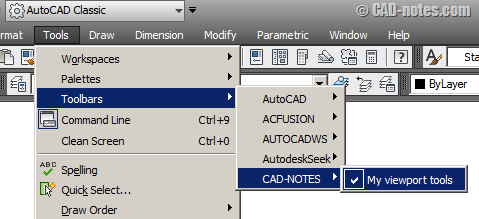
If you use classic interface, you can access it from menu tools> toolbars> YOUR CUI> YOUR TOOLBAR.
As I said before, it’s very easy. Especially if you compare it to placing commands in AutoCAD ribbon!
Working with menu
Working with menu is also the same. You create a new menu below menu category in CUI file and drag your commands there.
There are things to consider, because menu is not as flat as toolbar. You can create sub menu to group same commands with different options, and separator for similar commands.
See the menu structure below. Viewport layers is a sub-menu. It contains several commands.
To easily differentiate creating viewport and modifying viewport, we can add separator. This is very logical, especially if you are already familiar with programming or customization.
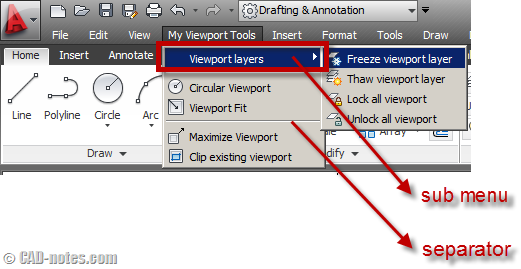
Now, how can we create the menu above in CUI?
- Similar to toolbar, create new menu. Right click above menus category and choose new menu from contextual menu.
- Drag your commands below your menu.
- Add new sub-menu if necessary and drag your group of commands there.
- Add separator if necessary. You can arrange the sequence by dragging them in CUI tree.
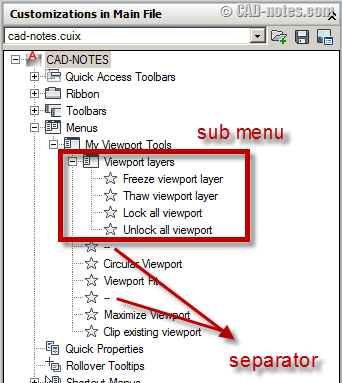
Arranging menu in workspace
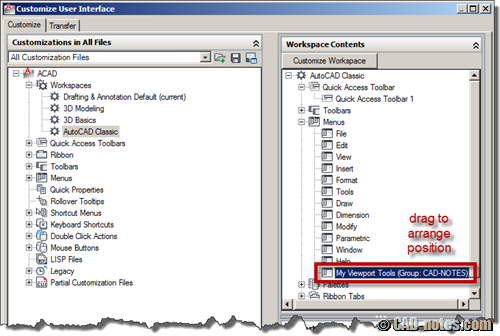
Your new menu by default should appears as the last item. If you want it to appear elsewhere, you have to move the sequence using CUI.
Open your CUI, choose to show ‘all customization files’. Expand workspaces and select which workspace you want to arrange.
After you select the workspace, from the right pane expand menus. Drag your menu to arrange the sequence.
Contextual menu
Do you like to choose commands from contextual menu? You can access it by right click your mouse. We call it contextual menu because it will show only relevant commands with your selection set.
Below is contextual menu for associative array.
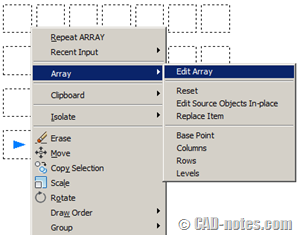
If you don’t have anything in selection set, then common tools you can get are navigation tools.
We covered how to create contextual menu in the past, so if you are interested on how to create it, you can read creating contextual menu tutorial here.


This is good for creating a custom toolbar utilizing the existing commands. What about creating custom toolbars with custom commands? For example, we have a line we need to place on a specific layer (or block for that matter). How do we get the button to place that line at a certain line weight on a certain layer? I used to be able to do this but it has been so long (over 8 years) since I have had to. Please let me know if you have any suggestions on this.
Thanks,
Mike
Michael,
You can use macro or LISP to do that. If your layer already define the line weight, you only need to change layer before starting line command.
Read this if you want to use LISP: https://www.cad-notes.com/2011/05/creating-layer-and-s…
Or this if you want to use macro: https://www.cad-notes.com/2012/02/exploring-autocad-cu…