During the design process, we always need to modify our drawings. We can have numerous revisions until the design is finished. Sometimes we need to compare and look what the differences between two revisions are.
If you have AutoCAD (not AutoCAD LT), you can download and install DWG Compare from Autodesk App Store. This add-in is provided for free by Autodesk.
To Install DWG Compare
Download DWG Compare here:
Download and install the Add-ins. You need to close AutoCAD before running the installer.
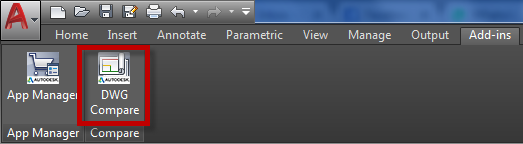
Using DWG Compare
After you completed the installation, you can open DWG Compare Palette from Add-Ins tab> Compare panel.
Running DWG Compare
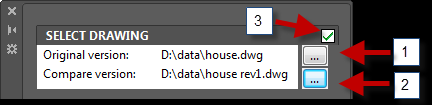
In DWG Compare Palette, you can select the drawings to compare. In (1) and (2) select the drawing that you want to compare. Then click (3) to start running the comparison.
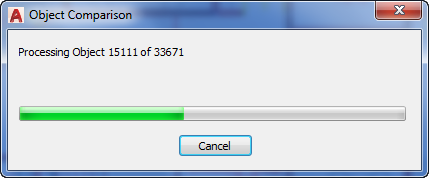
The plugin will run and compare the two drawings.
Reading the Comparison Result in Your Drawing
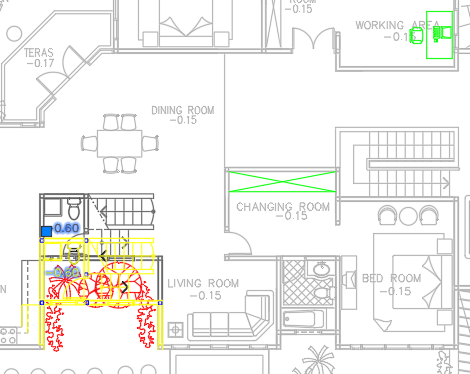
After the plugin finishes comparing your drawing, you can see the difference in the drawing area. The plugin changes the colors to allow you compare them easily.
- Gray color means the objects are the same.
- Green color means they are new objects.
- Yellow color means the objects are modified (moved, stretched, etc.)
- Red color means the objects are deleted.
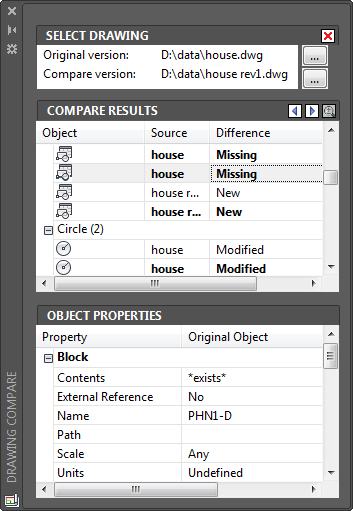
Reading the Comparison Result in DWG Compare Palette
You can also see the differences in the DWG Compare Palette. You can find the object type, source (the drawing file), and the difference (New, Missing/deleted, and Modified).
If you click the item, the object is highlighted in your drawing. You can see the object properties in the palette. However, they are only informational. You can’t change the properties here.
Summary
You can compare drawing sheets from any Autodesk application using Design Review. Plot the model or drawing on a sheet to DWF. Then compare the sheets. However, it is more convenient to compare the drawings within the native application. It is easier to see the differences between our drawings with this add-in.
Have you visited Autodesk App Store? What are your favorite add-ins that you get from there?


Hi Edwin,
Is it possible to compare between several drawings at same time
the consultant sent me a set of drawings Rev0 Then sent Rev1
I have to open each drawing then make comparing
So, I am wondering is there a way to compare between the 2 sets at one time
Thanks in advance
Hi Hassan,
You will need to use a software to do that. You can’t do it directly in Revit.