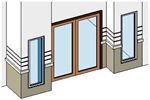
 We have defined the wall structure horizontally. Now we are going to make another wall type that define how is the wall defined vertically.
Activate wall tool. We are going to make some modification to wall type we created in this tutorial.
We are going to make a different type of wall for them. With those walls selected, click element properties > type properties. Let’s create another duplicate for the brick wall type. Click duplicate and give the type name: ‘vertical compound brick wall’.
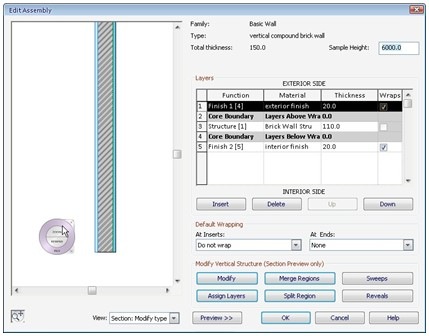
Click edit button next to structure parameter. These steps are exactly the same like what we did before. But this time, we are going to work by looking at the section view, not floor plan. Change the view from floor plan to section. It’s at the bottom of this dialog box.

You will see the preview become like this. You can zoom and pan the preview just like in your model. Use scroll button to zoom and mid button to pan the view. Alternatively, you can use the steering wheel by clicking the magnifier button at the left bottom of this dialog. Zoom until you see the wall layers and the wall bottom.

In the right bottom of this dialog, the’ modify vertical structure’ tools are now active. Click split region.

In the preview dialog box, move your pointer until you see the tool tip showing layer 1: exterior finish. You should split it 1000mm from the wall base.
![]()
Click to split it.
You can select the split line and adjust the height by activating modify tool. You can press [tab] several times to cycle between overlapping objects.
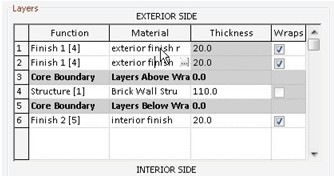
Now on the wall layers list, click the exterior finish to select it. Click insert to add one more layer. With the new layer selected, click assign layers in modify vertical structure group.
What are we going to do is to assign the new layer to the bottom part of the exterior layer. Click the bottom layer.

You should see the color is now different. Now change the layer function to finish 1 [4] and the material to a new material. Use one of an existing stone rendering material. Don’t forget to make a duplicate first.

Now we have defined different materials for exterior finish. See this animation how to split your wall exterior.
CAD Tutorials and Best Practices for professionals and students


Using stacked walls is the newer method to do this task.
Nice job. Thanks
thank you so much…Edwin
thanks, the video was quite helpful.
Do you have tutorials on how i can create window families.
I don't have creating window families tutorial, but these should be close:
1. Creating Revit Family: Door
2. Revit Family Exercise: Creating Brick Sholdiers
I used the split command but it changes the thickness of my finish to variable, making it impossible for me to have different layers.
Is there something I did wrong?
Thanks.
Hi Paul,
Sorry for the late reply. I'll try to capture a video how to do it and upload it later.