Do you like the Autodesk 360 rendering? If you have cloud points to access Autodesk 360 rendering, you can render your model in the cloud.
Rendering with background sometimes can be difficult to set up. It is easier to render it without background and edit the image later in an Image Editor to add background image.
It’s easy to do in Autodesk 360 rendering.
After you upload your file (or using render in cloud in your CAD application) go to https://rendering.360.autodesk.com.
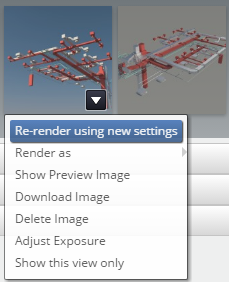
Expand the project and click the arrow near the view you want to render. Click re-render using new settings.
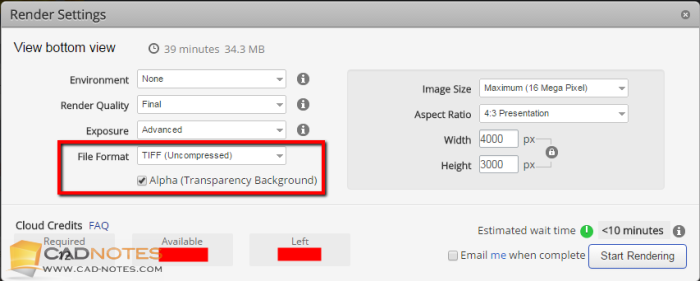
In the pop-up window, change the required configuration. You may want to adjust the render quality and image size.
To get the transparent background, change the file format to TIFF (uncompressed) and check the Alpha (Transparency Background). After you are satisfied with the settings, click start rendering.
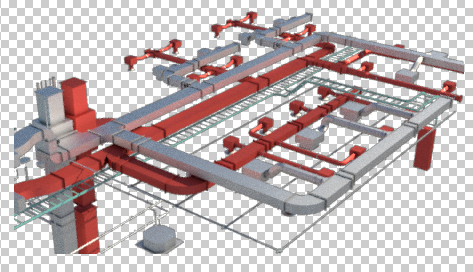
PNG are supposed to support transparent background. But when I tried it, it doesn’t give me what I want. After you render it, download the completed image. The thumbnail might not show transparent background, but the downloaded image will have it.
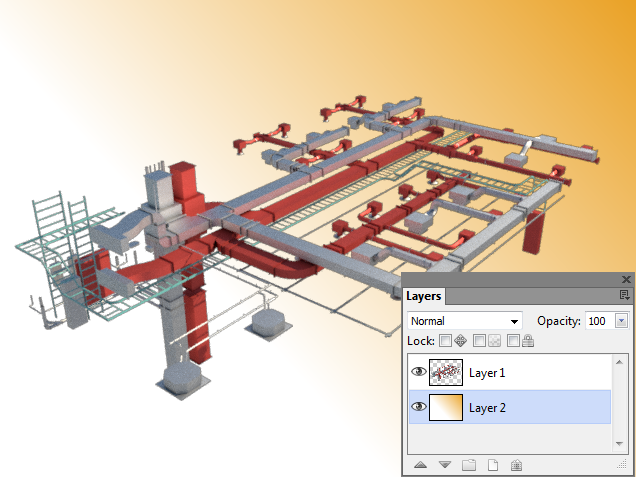
Now you can add the background for your image in an image editor quickly.


Autocad CAN create a render with a transparent background. The key is saving the render as a 24-bit TGA. Loading that TGA in Photoshop or gIMP which supports channels, you will find a channel representing the background which can be selected and used to create a mask all inside the TGA file. Load any background you want and you’re done.
Thank you for your feedback Robert,
Interesting, I tried it but it doesn’t give me the transparent background. I tried with TGA 24bit and 32bit, TIFF, all of them don’t give me the result I expected.
What is your AutoCAD version? Can you elaborate how you do it?
Absolutely! Using Autocad 2015 and newer, first make sure you have a solid background before rendering (if you set an image background then no alpha channel is created). Setup your view and lighting and render your scene to the render window. When it’s done, use File> Save As, then choose TGA as the file type and click Save. You should get another dialog box to choose the options. Choose “32 bits (24 Bits + Alpha)”
You can then open it in Photoshop where you’ll have a black background. In the Layers panel, switch to the Channels tab and Ctrl-Click the “Alpha1” channel which will select everything except the “background.” Switch back to the Layers tab and click the Mask button/icon which will create a mask of your selection, creating a perfect erase of the background, and you can put any image on a layer below and it will show through.
If you are using gIMP, when you load the TGA, the Alpha channel loads automatically
Unfortunately when I tried that I still can’t get the transparent background. I don’t know if this changed after Autodesk replaced the MentalRay rendering in AutoCAD 2016, or I didn’t follow your instructions correctly.